
How to use worm castings
Seedlings: Use up to 20 percent worm castings in your potting mix. More than 20 percent will not harm plants, but it won’t offer much additional benefit.
Vegetables and annuals: Side dress with about ½ cup of worm castings per plant as needed.
Transplants: Provide 1 inch of worm castings in planting hole before placing plant.
Potted plants: Mix 1 inch of worm castings with top of soil around base of plants as needed.
Trees and shrubs: Mix 1 inch of worm castings with top of soil around base of plants every month during growing season.
Worm Starter Mix instructions are located here:
(Word Doc) Worm Starter Mix
(PDF Doc) Worm Starter Mix1
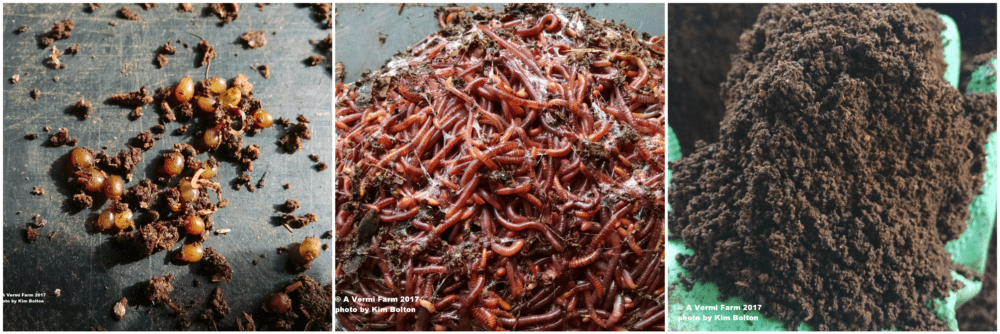
How to harvest your castings from a tote style bin
After you have fed your worm bin for 4 to 6 months (standard in a 10 to 20 gallon tote) you will notice all this nice dark “soil” in the bottom. This is the castings (worm poop) that the worms have created for you to use as their thanks for taking care of them. You will want to harvest before the contents turn anaerobic (a wet stinky mess) on you. If your bin is ready to harvest and the bottom is very wet line the sides of your tote with dry cardboard sheets, replace when wet, do this until the castings will form a nice loose ball when cupped.
*NOTE…this is for personal use only for the castings. Retail sales involves a different method and/or equipment in harvesting.
I have used the following three methods in harvesting my tote bins before I changed over to using bigger beds and commercial type CFT’s (continuous flow through) bins. Each one is dependent on how much time you want to spend harvesting the castings.
- Simple Transfer is to take the top third of your bin and place that in a newly prepared bin OR set this to the side to add back to the original bin after you have removed the castings. In doing this you will be adding back some of the beneficial microbes from your bin to help the worms adjust to the new bedding.
- Light Harvest Method involves placing the entire bins content on a flat surface under a light in a pile. Some do it as a cone or volcano shape to start with. Scrape a layer off until you see worms and then stop, the worms will dive down to escape the light. Do this every 15 to 30 minutes until you have just a pile of worms. DO NOT DO this in direct sunlight as the UV rays will harm/kill the microbes. Indirect light works just as well or under a overhead light also. *NOTE The entire bin must be finished (no visible food or bedding particles) to do this unless you have a sifter to remove those particles first.
- Migration Method takes longer but is effective as well but you can’t use this method if your bin is a small tote OR is completely full. When the bin contents have been worked well and you can’t recognize any bedding or food pieces then push the entire contents into one end of the bin. Add new bedding and food in the opposite corner and mix in a couple of handfuls of the finished section. This process will take up to 3 weeks to complete. If you want to make sure all the worms migrated over do the light harvest method on the remaining pile.
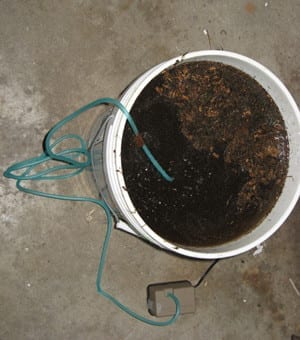 A simple way to make Aerated Casting Tea
It is best to brew or steep your tea at the temperature you will be applying.
(Notice: this is not Actively Aerated Compost Tea (AACT) by adding a simple sugar (unsulphured molasses) it will feed the bacteria and cause a growth in microorganisms and AACT needs to be used within 6 hrs of brewing for optimal results and it cannot be deprived of oxygen)
- Fill a 5 gallon bucket with tap water (let sit for 24 hours to de-chlorinate the water or use rain water). Don’t fill completely to the top you only need about 4 to 4.5 gallons of water.
- Use a paint strainer bag (Lowe’s or Home Depot the 5 gallon size is perfect)
- Use a aquarium pump rated for no less than 55 gallons (lots of oxygen, lots of bubbles). Mine has two ports and I leave both hoses open. I use a fishing sinker on each hose to weigh it down in the bucket.
- Hang the bag over the top of the hose so the air flow hits the bag. What you are striving for is releasing the microbes from the castings directly into the water.
- Brew time is very controversial on the internet, especially if you are using a food source. You are not using a food source in this way so I brew about 36 to 48 hours sometimes longer if I forget about it.
- When you are done with your brew time, pull the bag out and YES you can still use the castings in your garden, flower beds, potted plants etc. OR if you have a worm bin going dump them in it. They can be reused later coming from a working bin.
- You do not have to dilute this, just pour into a watering can and water your plants with it. I do a five gallon bucket once a week and all my houseplants are given this instead of regular tap water.
- Always water your plants/garden at sunrise or sunset with the tea. The sun will kill the microorganisms in your tea.
A simple way to make Steeped Casting Tea 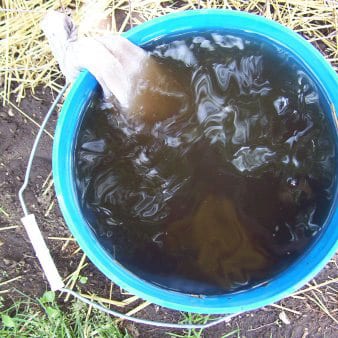
- Fill a 5 gallon bucket with tap water (let sit for 24 hours to de-chlorinate the water or use rain water). Don’t fill completely to the top you only need about 4 to 4.5 gallons of water.
- Add the tea bag to the bucket. Make sure to sit the bucket in the shade somewhere at or near the temperature you will be using it at.
- Let tea bag steep for at least 24 hours. You can tie a longer string to the bag and periodically bounce it up and down or just reach in and grasp the bag and bounce it. Or you can use a stick to stir it.
- When the tea is done pour into a watering can if you like for a foliar drench or water around the roots of your plants.
- When you are done with your brew time, pull the bag out and YES you can still use the castings in your garden, flower beds, potted plants etc. OR if you have a worm bin going dump them in it. They can be reused later coming from a working bin.
About Your Freshly Brewed or Steeped Worm Casting Tea:
Fresh worm casting tea is not only nutritious for your garden, orchard, lawn, vineyard, green house, but if you brew it, the brewing process will also multiply the population of beneficial microbes which naturally occur in the castings. This is what is so special about fresh brewed worm casting tea.
- It makes a wonderful foliar spray. Use a mister or pump sprayer to coat the foliage of your plants, garden, orchard or vineyard. Make sure your sprayer hasn’t used any chemicals in it first.
- Use it as a drench for your soil or compost pile. Use it as you would water in your watering can for your garden.
- Water your plant starts you are growing for your garden. It is safe for use in your green house, vineyard, lawn or orchard.
- The best time to apply the tea is when the sun is not directly shining on the area you wish to use the tea on, such as morning or evening.
- Lightly spray seeds prior to planting. It will increase germination success and reduce germination time for seeds.
- A foliage spray will get rid of hard bodied insect pests like aphids, spider mites and also tomato horn worms. It will stop plant maladies like black spot, powdery mildew, and damping off just to name a few.
Here is a great website to read about gardening with microbes:
http://www.gardeningwithmicrobes.com/index.shtml
Now for a website that helps explain AACT:
http://www.compostjunkie.com/making-compost-tea.html
And, you can’t go wrong with this pdf download if you are more of a scientific junkie:
http://www.nofanj.org/LiteratureRetrieve.aspx?ID=104151